
How to Change a Tap Washer
A dripping tap, mostly caused by a worn washer – the small rubber disc inside your tap that presses against the metal seat to stop water flow – is one of the easiest plumbing jobs you can tackle yourself. It helps you conserve water, save money, and often avoid the need to call a plumber.
But there's a catch: not every tap uses a washer. Modern taps with ceramic or cartridge mechanisms work differently, and trying to replace a washer in them won't fix the leak.
So, before you start, it's important to check your tap type and make sure a washer replacement is the right solution.
In this guide, we'll show you step by step how to tell if your tap has a washer, how to replace it properly, and when it's best to call in a plumber, so your tap works smoothly again.
TL;DR
- Check your tap type first, as only compression taps use rubber washers. Ceramic or quarter-turn taps operate differently, so do not attempt to replace the washer on them.
- Shut off the water safely
by turning off the main metre or the under-sink isolation valves, open the taps to drain the lines, and block the sink drain with a towel.
- Remove tap components carefully. Take off the handle, bonnet, and spindle; lay the parts in order on a towel and snap a quick photo for reference.
- Inspect and prepare the tap seat. Look for pits, grooves, or limescale. Minor damage can be smoothed; severe corrosion may mean the tap needs replacing.
- Replace the washer and O-ring by removing the old washer, cleaning the jumper valve, installing the new washer, and lubricating the O-ring.
- Reassemble using your photo as a guide. Centre the jumper valve on the seat, hand-tighten the bonnet, then finish with a spanner. Align the handle for neat operation.
- Test by gradually turning the water back on, flushing for a few seconds, and checking the tap. Re-adjust the washer, bonnet, or O-ring if leaks persist.
- Call a plumber if you can't isolate the water, the handle spins freely, the pipes run behind the wall, or the tap is very old.
Confirm Your Tap Type: Is It a Compression Tap?
Only compression taps, which are traditional old taps where you turn the handle several times to open or close the water, use a rubber washer to stop the water flow.
Modern taps, like ceramic disc or quarter-turn models, work differently: they use two smooth ceramic plates to control water, so the repair steps are completely different.
You can figure out your tap type just by turning the handle.
You probably have a compression tap if:
- You need to turn the handle several times (usually two or three full rotations) to go from fully off to fully on.
- The handle feels noticeably tighter as it gets closer to being fully closed.
- You feel resistance right at the very end when shutting it off.
That tightening feeling is the compression action – the rubber washer is pressed firmly against the metal seat, stopping the water flow.
You likely have a ceramic or quarter-turn tap if:
- The handle only moves about 90 degrees (a quarter turn) to go from off to full flow.
- The movement feels smooth and light from start to finish.
- It stops abruptly without needing any extra tightening.
If you've confirmed it's a compression tap, you can replace the washer in a few easy steps that we have covered below.
Gather The Tools and Parts for the Job
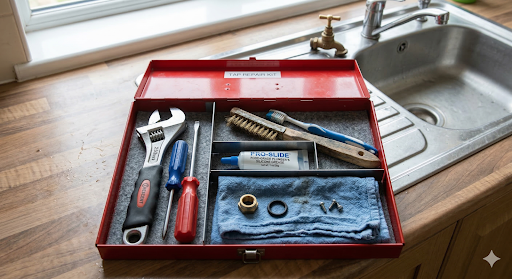
Before pulling the tap apart, set up a small workspace on your vanity or kitchen bench with everything you'll need. Having everything ready turns this into a quick 10–15-minute repair instead of a drawn-out job.
Your Essential Toolkit
- Adjustable spanner (crescent wrench): This is your main tool for loosening and tightening the tap bonnet nut (the hexagonal nut that secures the tap body). A 200–250 mm adjustable spanner provides enough grip and leverage to turn taps that haven't been opened in years.
- Screwdrivers (flathead and Phillips): Most tap handles are secured with a small screw hidden beneath the hot- or cold-indicator cap. A screwdriver lets you safely remove the cap and handle.
- Old towel or thick rag: You need this to place over the sink drain hole. It prevents small screws from falling into the drain and protects the sink surface if a tool slips.
- Small wire brush or old toothbrush: You'll use this to scrub away the white, crusty limescale buildup from the tap seat and threads so the new parts can seal properly.
- Plumber's silicone grease: A small amount of food-grade silicone grease makes the tap turn smoothly and prevents the rubber from drying out in Townsville's heat.
Parts to Have On Hand
- Replacement tap washers: Most standard Australian basin and sink taps use a 12 mm (½-inch) washer, while some larger taps, like laundry or garden taps, may use a 15 mm (⅝-inch) washer. Washers also come in different profiles – flat or bevelled (cone-shaped) – and materials, such as standard rubber or high-temperature/Duo rubber for hot-water taps. To ensure you get the right one, take the old washer to the hardware store, and the staff will help you match the diameter, thickness, shape, profile, and material for a proper, long-lasting fit.
- Spindle O-ring: A small circular rubber seal that sits around the tap spindle shaft. Its job is to stop water leaking around the handle when the tap is turned on.
- Valve seat repair tool (reseating tool): This is a handheld tool with a small cutting head to smooth the metal valve seat inside the tap body.
- Penetrating oil: A thin lubricant designed to seep into tight threads and joints to loosen stuck tap handles or bonnet nuts.
Now that you have your tools and replacement parts ready, you can start the actual job.
Step 1: Shut off the water and drain the line
Before opening the tap, you need to stop water from reaching it. This prevents water from spraying out once the tap body is loosened.
In most Townsville homes, the main water shut-off point is located at the water metre box out the front of the property, usually near the footpath or nature strip. Lift the lid of the plastic or concrete box and turn the metre isolation valve clockwise until it stops. This shuts off the water supply to your entire house.
If you live in an apartment or a newer home, you may have small isolation valves under the sink. These look like short chrome taps on the hot and cold pipes. Turn them clockwise to close the water flow to the tap. Because the local water contains higher mineral content, these small valves can sometimes stick or fail to close fully. In such situations, please do not force it. Simply shut off the main metre valve.
Once the water supply is off:
- Turn the leaking tap fully on. You'll see a short burst of water, followed by a slow trickle as the remaining pressure in the pipes is released. To drain the line fully, open another tap at a lower point in the house, such as a garden or laundry tap. This lets any remaining water in the pipes drain out so you can remove the tap components without water dripping onto your work area.
- Block the sink drain by placing a towel or rag over the drain opening to prevent small parts, such as screws or the jumper valve, from falling in while you work.
Step 2: Remove The Tap Handle
Next, remove the tap handle to access the internal parts.
Most traditional taps have a decorative cap on top, which you can gently pry off using your fingernail or a thin flat-head screwdriver. To avoid scratching your chrome-plated handle or flange, wrap the jaws of your spanner or the tip of your screwdriver in a thin cloth before touching the metal.
Underneath the cap, you'll find a screw holding the handle in place. Use the screwdriver to remove it, and the handle should slide straight off.
Some taps, especially slightly newer models, use a small grub screw (a tiny screw set into the handle) instead of a top screw. These are normally hidden on the side or underneath the handle and require an Allen key (a small L-shaped hex key) to loosen.
Often, minerals in the water can form crusty deposits that make the handle stick to the spindle (the central metal shaft inside the tap that the handle turns to open or close the water). If it won't come off easily:
- Give it a gentle rock: Wiggle the handle back and forth to break the mineral bond.
- Use a lubricant: Apply a small amount of penetrating oil and wait 10 minutes before trying again. The handle will come off smoothly once the mineral seal has loosened.
Step 3: Remove the Bonnet/Nut and Lift Out The Spindle
With the handle removed, you'll see the brass bonnet – the large nut that holds the internal parts of the tap in place. Inside this bonnet sits the spindle, the threaded shaft that moves up and down when you turn the tap.
Before grabbing your spanner to remove the nut, check the spindle's position. If it is fully wound down (fully closed), the internal pressure can lock the bonnet nut, making it very difficult to turn. Use your fingers or pliers to twist the spindle slightly anti-clockwise so it sits roughly halfway open. This relieves pressure inside the tap and makes the bonnet much easier to remove.
Now place your spanner snugly around the bonnet nut and hold the tap body or spout firmly with your other hand to keep the fixture steady. Turn the spanner anti-clockwise with steady pressure until the bonnet nut loosens, and then finish unscrewing it by hand.
Once the bonnet is off, lift the spindle straight out of the tap body.
Pro tip: As you remove the parts, place them on a towel in the same order you removed them. It's also a good idea to take a quick photo. That way, you have a simple reference to help you put everything back together correctly later.
Step 4: Inspect the Tap Seat and Retrieve The Valve
Once the spindle is removed, you can clearly see inside the tap body. At this stage, there are two things to do:
1. Retrieve the jumper valve:
The jumper valve is a small, removable brass plug that sits between the spindle and the seat and holds the rubber washer you are here to change. Check the bottom of the spindle you removed. If the brass plug isn't clipped to the spindle, it will be sitting at the bottom of the tap hole. Use your fingers or needle-nose pliers to lift it out. You need the jumper valve in your hand to properly replace the washer.
2. Check the tap seat:
With the jumper valve removed, shine a torch down the tap hole. At the bottom, you'll see the tap seat – a fixed, circular brass rim. This is the surface the rubber washer presses against to stop the water flow. The seat should look smooth and even. If you notice grooves, small pits, or white mineral buildup, the washer may not seal properly, allowing water to slip through.
For minor damage, you can use a tap-seat reseating tool to lightly grind the brass smooth again. However, if the seat looks badly corroded or uneven, the tap may be too worn to repair, and it's safer to have a plumber replace the tap body.
Step 5: Replace the Washer
Now that the jumper valve is in your hand and the seat is smooth, you can replace the washer.
Please remember to lay the parts on a towel in the same order you will take them out, and take a quick photo so you know exactly how to put them back together during reassembly.
- Remove the old washer: it's the black rubber disc at the end of the jumper valve. If it's loose, pry it off with a flat-head screwdriver. If it is held by a tiny screw or nut in the middle, unscrew it. Over time, the rubber becomes hard, cracked, or flattened, which is why the tap was dripping.
- Clean the jumper valve: Use an old toothbrush to scrub away any crusty white limescale from the brass plug. Any debris left behind will prevent the new washer from sitting flat, causing uneven sealing and leaks.
- Check the screw: If the screw looks green, rusted, or corroded, replace it. A snapped or damaged screw can make the tap unusable during reassembly.
- Install the new washer: Press a new rubber washer onto the jumper valve. If your tap has a tiny screw or nut, put it back in and tighten it. Do not overtighten, or you will squish the rubber and damage it before the tap is even used. A new, soft washer will now compress perfectly against the seat, stopping the water flow.
Step 6: Replace or Grease the O-Rings (Optional but Recommended)
Not all leaks come from the washer. If you notice water seeping from under the handle or trickling down the wall when the tap is turned on, the O-ring may be the culprit. The O-ring is a small rubber loop that seals the spindle, preventing water from travelling up the shaft.
To fix it, slide the old O-ring off the spindle. You may need to gently pry it with a small flathead screwdriver. Take your spindle or old O-ring to a local hardware store to find an exact replacement.
Before installing the new O-ring, apply a small amount of plumber's silicone grease to both the spindle and the O-ring itself. This helps the rubber slide smoothly when you turn the tap, prevents it from twisting or tearing, and creates a better seal against leaks.
Step 7: Reassemble and Tighten Correctly
With the new washer in place and the O-ring lubricated, it's time to put the tap back together. Use the photos you took earlier as a reference to make sure everything goes in the right order.
Follow these steps carefully to avoid damaging the threads or seals:
- Insert the internal parts: Drop the jumper valve with the new washer back into the tap hole, or clip it onto the spindle. Slide the spindle assembly back into the tap body, making sure the valve is centred on the seat for an even seal.
- Hand-tighten the bonnet:
Thread the large brass nut (bonnet) onto the tap body by hand first, turning it clockwise until finger-tight. This aligns the threads properly and prevents cross-threading.
- Final tighten with the wrench:
Use your adjustable spanner to give the bonnet one firm, final turn. Hold the tap body or spout steady with your other hand to prevent twisting, which could damage hidden copper pipes.
- Replace the handle: Slide the handle back onto the spindle. Before tightening the screw, position the handle so it sits straight when the tap is fully closed to ensure smooth operation.
Step 8: Turn the Water Back On and Test
Now that your tap is fully reassembled, it's time to carefully restore water pressure.
First, make sure the tap handle is in the off position. This lets the new washer sit properly on the seat so it can handle the incoming water right away.
Next, go to your isolation valve or main water metre and turn it on slowly, about a quarter-turn at a time. Once the water is flowing fully, turn the tap to a medium flow and let it run for 15–30 seconds. This flushes out any trapped air and clears tiny grit or mineral flakes that may have been loosened during the repair.
Finally, close the tap gently and check:
- The spout: Is it completely dry, with no drips?
- The handle: Is water seeping from under the decorative cap?
- The feel: Does the handle turn smoothly without sticking?
If everything is dry and the tap operates smoothly, congratulations, you've successfully serviced your tap.
Troubleshooting If The Issues Persist
If your tap is still leaking or feels stiff after replacing the washer and reassembling everything, don't panic. Most of the time, the issue is something small that can be corrected with a quick check.
Drip From the Spout Won't Stop
If the tap continues dripping from the spout, the washer likely isn't forming a proper seal.
The most common reason is that the washer isn't sitting flat. It may have shifted during reassembly, or the retaining screw may not be holding it evenly. Another possibility is the wrong washer size or type. Washers come in flat or bevelled (cone-shaped) styles. Bevelled washers often seal better in older taps because the angled edge can still seal even if the tap seat is slightly worn.
To fix these issues, turn off the water again and remove the spindle assembly. Check that the washer sits straight on the jumper valve. If it has shifted or is sitting unevenly, remove it, reinstall it so it lies flat, and make sure the retaining screw is secure. If the washer looks distorted or undersized, replace it with the correct 12 mm (½-inch) washer, or try a bevelled washer for worn seats.
Water Leaks From Around the Handle
If the spout is dry but water appears around the handle or runs down the tap body when the tap is turned on, the issue could be the bonnet or the O-ring seal around the spindle.
First, check that the bonnet nut is tightened properly. If it's slightly loose, water can escape around the spindle. Give the bonnet a small extra turn with your spanner to gently compress the seal.
If the leak continues, the O-ring may not be seated correctly. During reassembly, it can sometimes twist, stretch, or slip out of its groove. Turn off the water again, remove the spindle assembly, and check the O-ring. If it looks twisted or out of place, reposition it properly in its groove and apply a small amount of silicone grease before reinstalling the spindle.
Handle Feels Stiff or Hard to Turn
If the tap stops dripping but the handle feels stiff, gritty, or difficult to turn, the spindle may not be moving smoothly inside the tap body.
The most common cause is dry or worn O-rings or a lack of lubricant on the spindle threads. Without lubrication, friction increases, and the handle can feel tight when opening or closing the tap.
To fix this, turn off the water again and remove the spindle assembly. Check that the O-ring is in good condition and sitting properly in its groove. Apply a small amount of plumber's silicone grease to the O-ring and the spindle threads before reinstalling the parts.
If the handle still feels rough after lubrication, mineral buildup on the spindle threads may be the cause. Clean the threads gently with an old toothbrush before reassembling.
When to Call a Plumber (or Consider Replacing the Tap)
Sometimes, even after checking everything, a tap won't work properly. This usually means the problem isn't the washer or O-ring anymore – it's the tap itself.
You should call a plumber if:
- You can't isolate the water – the main water metre is seized or buried, so shutting off the flow safely isn't possible.
- The handle just spins – if the handle just spins and spins without tightening, the internal brass threads are stripped. This cannot be repaired; the tap must be replaced.
- Pipes move behind the wall – if you feel clunking or shifting when adjusting the bonnet, stop immediately. Forcing it could burst a pipe inside the wall.
- Persistent leaks despite multiple fixes – if you've replaced the washer and O-ring and reseated the seat, but the tap still drips, the body is likely cracked, worn, or corroded.
- Seized or corroded internal parts – if the spindle, bonnet, or other internal components are stuck solid due to corrosion, forcing them risks damage to the tap or pipes.
- Damaged or uneven tap seat – severe pitting or grooves that can't be smoothed out with a reseating tool.
- Your tap is very old – taps over 20 years old often have worn internal parts. It is better to replace it with a modern ceramic-disc tap. These don't use washers and are far more reliable for local water conditions.
A professional plumber will inspect the tap body and internal parts, identify the exact cause of the leak or fault, and either repair or replace components safely. For older or heavily worn taps, they may recommend installing a modern tap to ensure a reliable, long-lasting seal without repeated DIY fixes.
Final Thoughts
Regular maintenance is the best approach to keep your taps in top condition. Routine checks for leaks, cleaning away mineral buildup, and swapping out washers before they fail can save water, prevent damage, and extend the life of your taps.
When a washer does wear out, replacing it is simple and can be done at home with the right tools, the correct size, and a little care. But sometimes, even when you follow all the steps, the tap seat, spindle, or older fittings just won't cooperate. That's when it's smarter to call in the experts rather than risk bigger problems or water damage.
Our licensed team at 1touch Plumbing can inspect, repair, or replace taps efficiently, keeping your water flowing smoothly and your home leak-free.
Contact us today to get professional help and avoid costly water wastage.
FAQs
Is it legal for me to change my own tap washer in Queensland?
Yes, it is completely legal. In Queensland, replacing a jumper valve or tap washer is considered unregulated work, which means you can safely do it yourself without a plumbing licence.
However, anything more complex, like replacing the entire tap assembly, altering pipework inside walls, or modifying water lines, must be performed by a licensed plumber. Doing more than a washer change without a licence could breach regulations and risk water damage or unsafe plumbing.
How often should I expect to replace my washers?
In Townsville, tap washers typically need to be replaced every 1 to 2 years. The local water has high mineral content, so over time, limescale builds up on the tap seat, creating grit that acts like sandpaper on the rubber washer. This gradually wears it down, causing the tap to start dripping.
A good rule of thumb is that if you notice yourself tightening the handle more than usual to stop a drip, it's time to replace the washer. Regular checks can prevent leaks and save water.
Why did my tap start leaking again just a few weeks after I fixed it?
If a new washer fails quickly, the most common reason is a damaged tap seat. The seat is the brass rim inside the tap that the washer presses against to stop water. Over time, tiny grooves, pits, or wear can form on the seat. Even a brand-new washer can't seal properly against these imperfections, so the leak comes back almost immediately.
To fix this, you can use a tap-seat reseating tool to smooth the surface. If the metal is too thin, corroded, or badly damaged, the best option may be to replace the tap body entirely, especially in older taps or in areas like Townsville where mineral buildup is common.
Can I use Vaseline to grease the spindle?
No. You should never use petroleum-based products like Vaseline on plumbing parts. Petroleum can damage rubber components, causing O-rings and washers to swell, crack, or rot, which leads to leaks. Instead, use a food-grade silicone grease, which is waterproof, safe for drinking water, and keeps the rubber soft and flexible, ensuring your washer and O-ring last much longer, even in Townsville's hot, humid climate.